


Any clean corner in the drawing can be used as a reference point for combining multiple scans.
A corner is considered clean when it contains more than 5 points and at least 20 cm of straight line on its right side.
The longer this right-side line is, the better the alignment will be.
Whenever possible, choose corners that will have the maximum visible length from the next scanning position.
If you used Smart Scan, there is a chance that the number of points is limited.
If the right-side line is less than 1 meter, scan additional points to improve accuracy.
The procedure is as follows:
1.After you finish your first scan and want to move to next Tap Next Scan.
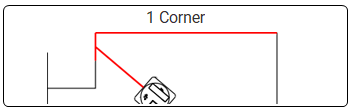
2.Choose “1 Corner”
3. A new screen will appear prompting you to choose corner. Only the red points are available for selection. You might need to wait for a couple of seconds until they appear.
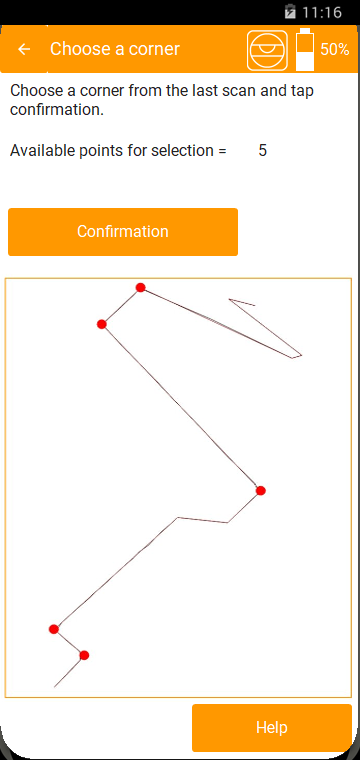
4. Tap the point you want.
5. Tap Confirmation.
6. Now the application will prompt you to move 2dscanner to new position and aim the left start of the left line of the corner. For example if the point is the one in the red circle you must aim the laser spot at the point indicated by the black arrow. The first element that will be scanned must be the corner of interest.

7. Tap Get Distance.
8. Let the 2Dscanner handle the rest.
The merge is completed when the 2d scanner either detects a point that does not belong to the second line, or when the length of the second line becomes longer than the corresponding line from the previous scan.
9. Once this area is scanned, you will receive a message confirming that the scans have been aligned.
Tap Accept and you can continue scanning. If the alignment has failed you can Cancel and try again.

At any time, it is possible to cancel the procedure, even after moving the 2D scanner.
The main advantages of using corners instead of stickers are these:
-There are no height constraints, allowing the 2Dscanner to be placed at different heights between positions, as long as the wall edges are vertical.
-Corners already exist so we do not need to place anything at walls.
-There is no precise aiming, since the corner is scanned automatically.